
一、创建Operator
拉取源码
[root@k8s-master01 ~]# git clone https://gitee.com/jeckjohn/operator-redis.git
创建Operator
$ cd /root/operator-redis/deploy/crds
$ kubectl create -f ./
$ kubectl create ns redis-cluster
$ cd /root/operator-redis/deploy
$ kubectl create -f service_account.yaml -n redis-cluster
$ cd /root/operator-redis/deploy/namespace
$ kubectl create -f operator.yaml -n redis-cluster
$ kubectl create -f role.yaml -n redis-cluster
$ kubectl create -f role_binding.yaml -n redis-cluster
结果验证
[root@k8s-master01 namespace]# kubectl api-resources | grep DistributedRedisCluster
distributedredisclusters          drc          redis.kun/v1alpha1                     true         DistributedRedisCluster
二、创建Redis集群
2.1 非持久化数据
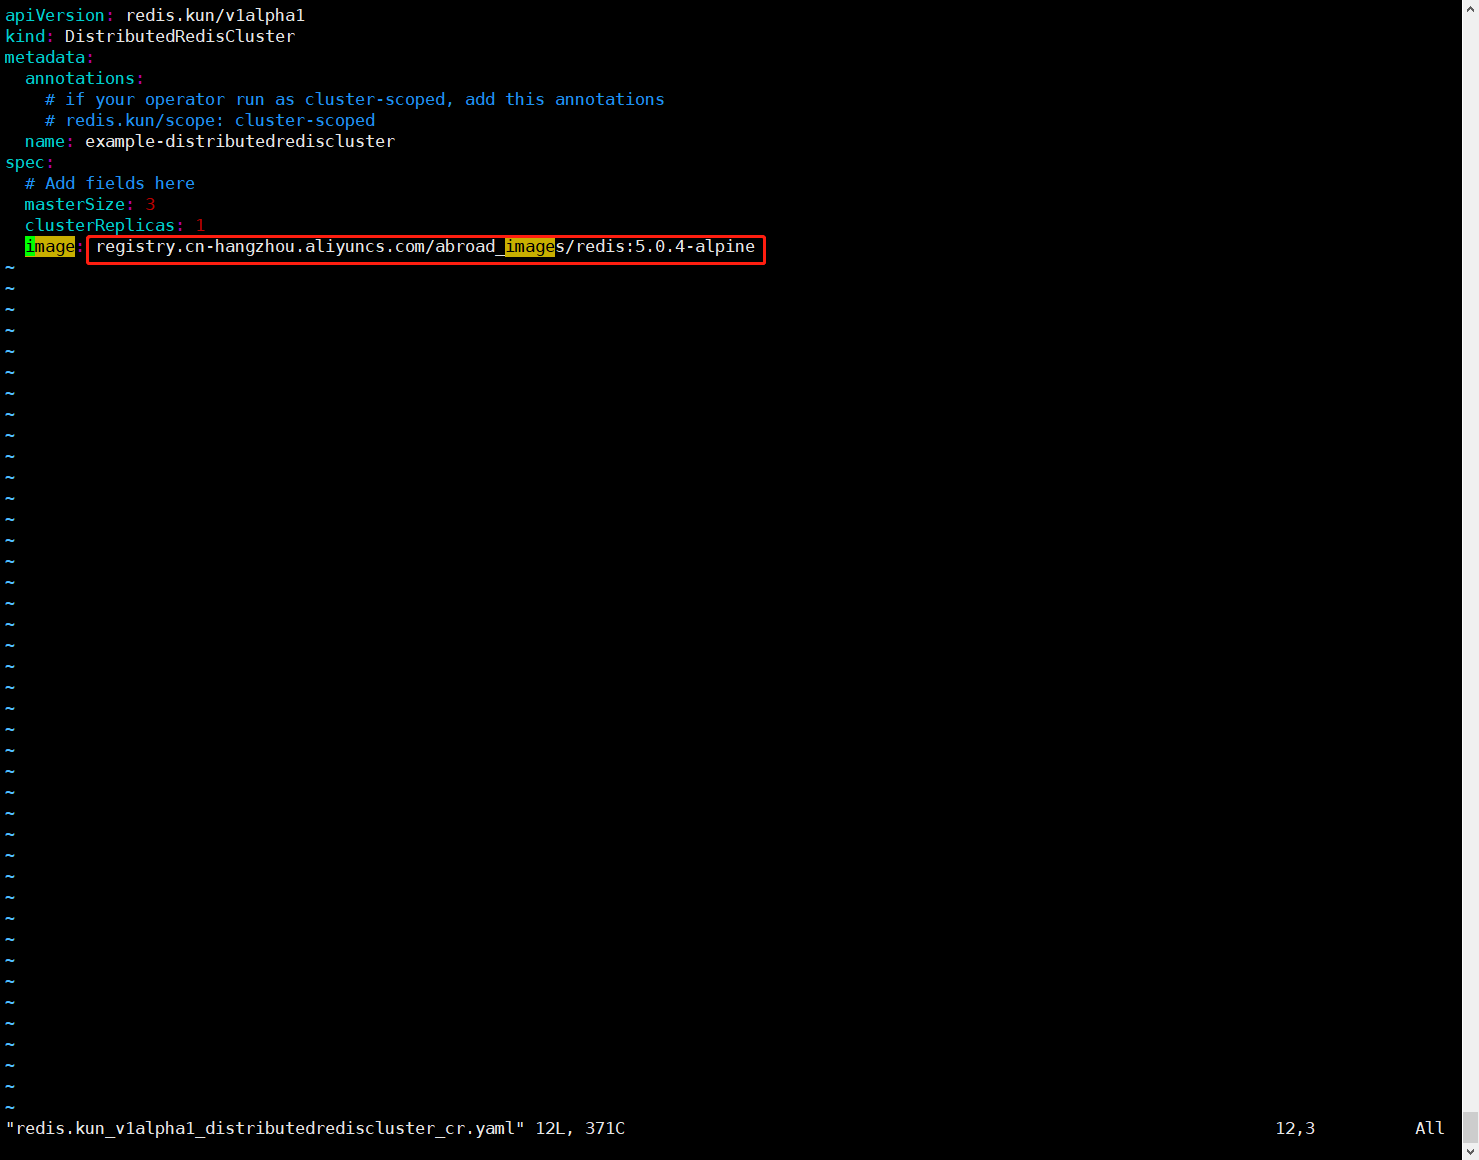
1.修改redis.kun_v1alpha1_distributedrediscluster_cr.yaml镜像为国内镜像
$ cd /root/operator-redis/deploy/example
$ vim redis.kun_v1alpha1_distributedrediscluster_cr.yaml
apiVersion: redis.kun/v1alpha1
kind: DistributedRedisCluster
metadata:
  annotations:
    # if your operator run as cluster-scoped, add this annotations
    # redis.kun/scope: cluster-scoped
  name: example-distributedrediscluster
spec:
  # Add fields here
  masterSize: 3
  clusterReplicas: 1
  image: registry.cn-hangzhou.aliyuncs.com/abroad_images/redis:5.0.4-alpine
上面参数说明:
- masterSize:新建的Redis集群有几个主节点
- clusterReplicas:每个主节点有几个从节点
2.创建Redis集群
$ cd /root/operator-redis/deploy/example
$ kubectl create -f redis.kun_v1alpha1_distributedrediscluster_cr.yaml -n redis-cluster
3.查看集群状态
[root@k8s-master01 example]# kubectl get distributedrediscluster -n redis-cluster
NAME                              MASTERSIZE   STATUS   AGE
example-distributedrediscluster   3                     46s
说明:这里STATUS状态没有显示healthy也是正常的
同时也可以查看Pod的状态
[root@k8s-master01 example]# kubectl get po -n redis-cluster
NAME                                      READY   STATUS    RESTARTS       AGE
drc-example-distributedrediscluster-0-0   1/1     Running   0              171m
drc-example-distributedrediscluster-0-1   1/1     Running   0              167m
drc-example-distributedrediscluster-1-0   1/1     Running   0              171m
drc-example-distributedrediscluster-1-1   1/1     Running   0              170m
drc-example-distributedrediscluster-2-0   1/1     Running   0              171m
drc-example-distributedrediscluster-2-1   1/1     Running   0              170m
redis-cluster-operator-6684799bb6-75b9l   1/1     Running   3 (173m ago)   174m
4.查看服务,我们可以通过svc.ns:port的形式进行访问集群内部,即example-distributedrediscluster.redis-cluster:6379
[root@k8s-master01 example]# kubectl get svc -n redis-cluster
NAME                                TYPE        CLUSTER-IP     EXTERNAL-IP   PORT(S)              AGE
example-distributedrediscluster     ClusterIP   10.0.131.0     <none>        6379/TCP,16379/TCP   179m
example-distributedrediscluster-0   ClusterIP   None           <none>        6379/TCP,16379/TCP   179m
example-distributedrediscluster-1   ClusterIP   None           <none>        6379/TCP,16379/TCP   179m
example-distributedrediscluster-2   ClusterIP   None           <none>        6379/TCP,16379/TCP   179m
redis-cluster-operator-metrics      ClusterIP   10.0.136.106   <none>        8383/TCP,8686/TCP    3h1m
2.2 持久化数据
1.修改redis.kun_v1alpha1_distributedrediscluster_cr.yaml文件,主要修改内容为:替换镜像为国内镜、替换persistent-claim为真实环境的SC名称、注释掉redis.kun/scope: cluster-scoped。
$ cd /root/operator-redis/deploy/example
$ vim persistent.yaml
apiVersion: redis.kun/v1alpha1
kind: DistributedRedisCluster
metadata:
  annotations:
    # if your operator run as cluster-scoped, add this annotations
    # redis.kun/scope: cluster-scoped
  name: example-distributedrediscluster
spec:
  image: registry.cn-hangzhou.aliyuncs.com/abroad_images/redis:5.0.4-alpine
  masterSize: 3
  clusterReplicas: 1
  storage:
    type: persistent-claim
    size: 1Gi
    class: csi-rbd-sc
    deleteClaim: true
注意:需要注释redis.kun/scope: cluster-scoped
上面参数说明:
- masterSize:新建的Redis集群有几个主节点
- clusterReplicas:每个主节点有几个从节点
2.创建Redis集群
$ cd /root/operator-redis/deploy/example
$ kubectl create -f persistent.yaml -n redis-cluster
3.查看集群状态
[root@k8s-master01 example]# kubectl get distributedrediscluster -n redis-cluster
NAME                              MASTERSIZE   STATUS   AGE
example-distributedrediscluster   3                     46s
说明:这里STATUS状态没有显示healthy也是正常的
同时也可以查看Pod的状态
[root@k8s-master01 example]# kubectl get po -n redis-cluster
NAME                                      READY   STATUS    RESTARTS       AGE
drc-example-distributedrediscluster-0-0   1/1     Running   0              171m
drc-example-distributedrediscluster-0-1   1/1     Running   0              167m
drc-example-distributedrediscluster-1-0   1/1     Running   0              171m
drc-example-distributedrediscluster-1-1   1/1     Running   0              170m
drc-example-distributedrediscluster-2-0   1/1     Running   0              171m
drc-example-distributedrediscluster-2-1   1/1     Running   0              170m
redis-cluster-operator-6684799bb6-75b9l   1/1     Running   3 (173m ago)   174m
4.查看服务,我们可以通过svc.ns:port的形式进行访问集群内部,即example-distributedrediscluster.redis-cluster:6379
[root@k8s-master01 example]# kubectl get svc -n redis-cluster
NAME                                TYPE        CLUSTER-IP     EXTERNAL-IP   PORT(S)              AGE
example-distributedrediscluster     ClusterIP   10.0.131.0     <none>        6379/TCP,16379/TCP   179m
example-distributedrediscluster-0   ClusterIP   None           <none>        6379/TCP,16379/TCP   179m
example-distributedrediscluster-1   ClusterIP   None           <none>        6379/TCP,16379/TCP   179m
example-distributedrediscluster-2   ClusterIP   None           <none>        6379/TCP,16379/TCP   179m
redis-cluster-operator-metrics      ClusterIP   10.0.136.106   <none>        8383/TCP,8686/TCP    3h1m