
if
1、修改values.yaml
$ helm create my-template
$ rm -rf templates/*
$ cd my-template
$ cat > values.yaml <<EOF
myname: aming
service:
  type: ClusterIP
  port: 80
  myport: 8080
EOF
2、修改service.yaml
$ cd my-template
$ cat > templates/service.yaml <<EOF
apiVersion: v1
kind: Service
metadata:
  name: testserivce
  labels:
    app: myapp
spec:
  type: {{ .Values.service.type }}
  ports:
    {{- if eq .Values.web "nginx" }}
    - port: {{ .Values.service.port }}
    {{- else }}
    - port: {{ .Values.service.myport }}
    {{- end }}
      targetPort: http
      protocol: TCP
      name: http
EOF
说明:在if else end 左边加-,是为了去掉空行。{{- 表示删除左边的所有空格,直到非空格字符,而 -}}表示删除右边的所有空格。注意,换行符也是空格,当然还包括空格,TAB字符
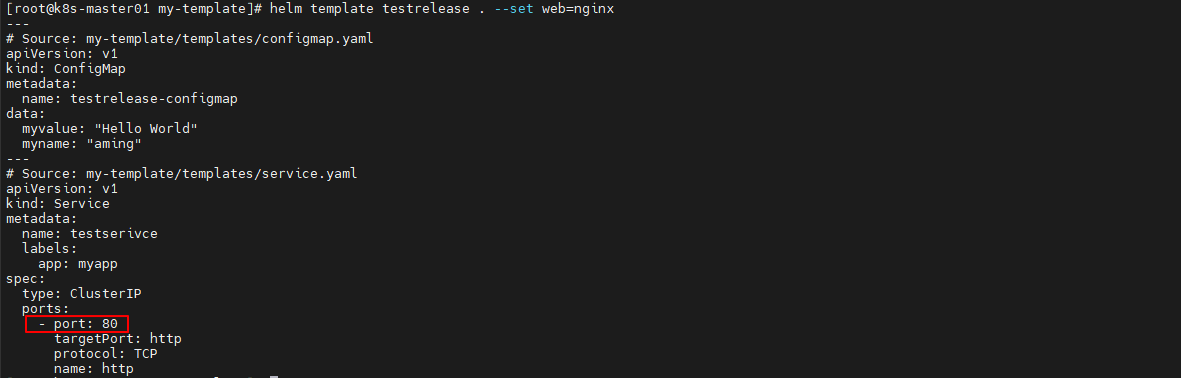
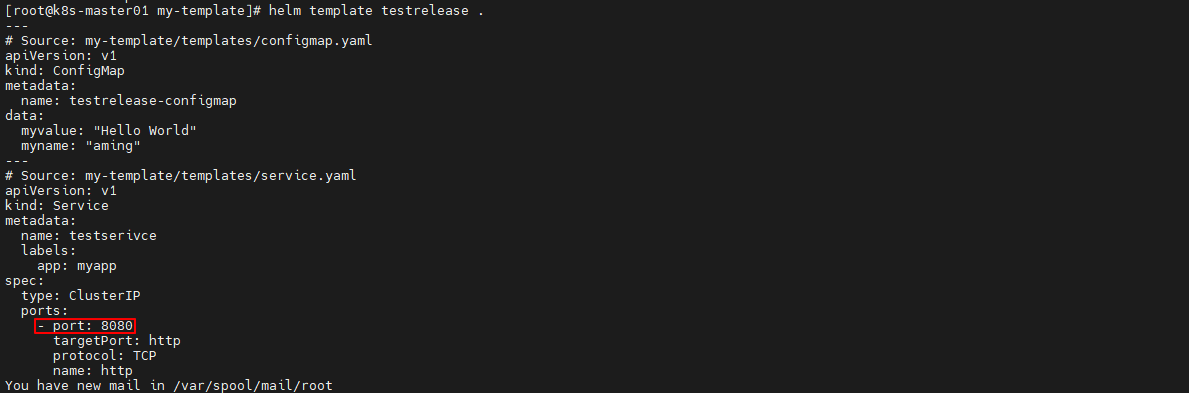
3、渲染
$ cd my-template
$ helm template testrelease . --set web=nginx
如果不定义web变量的值,port为8080
$ helm template testrelease .
with 限定作用域
with 的语法类似简单的 if:
{{ with PIPELINE }}
  # restricted scope
{{ end }}
没有用 with 的例子
values.yaml
env:
  host: localhost
  user: test
  hello: world
deployment.yaml 的引用:
       {{- if .Values.env }}
        env:
        - name: host
          value: {{ .Values.env.host }}
        - name: user
          value: {{ .Values.env.user }}
        - name: hello
          value: {{ .Values.env.hello }}
        {{- end }}
上面的变量引用都需要从.Values开始,都需要重复输入.Values.env, 有点繁琐。
下面使用with简化上面步骤
deployment.yaml 添加 with 以后
       {{- with .Values.env }}
        env:
        - name: host
          value: {{ .host }}
        - name: user
          value: {{ .user }}
        - name: hello
          value: {{ .hello }}
        {{- end }}
with 语句块里, 把当前范围定义在了.Values.env这个变量上了。
渲染后结果:
env:
 - name: host
   value: localhost
 - name: user
   value: test
 - name: hello
   value: world
range 实现循环
在values.yaml 文件中添加上一个变量列表:
$ helm create my-template
$ rm -rf templates/*
$ cd my-template
$ cat > values.yaml <<EOF
myname: aming
service:
  type: ClusterIP
  port: 80
  myport: 8080
test:
  - 1
  - 2
  - 3
EOF
循环打印该列表:
$ cd my-template
$ cat > templates/configmap.yaml <<EOF
apiVersion: v1
kind: ConfigMap
metadata:
  name: {{ .Release.Name }}-configmap
data:
  myvalue: "Hello World"
  myname: {{ quote .Values.myname }}
  test: |
  {{- range .Values.test }}
    - {{ . }}   ##遍历循环打印所有元素
  {{- end }}
EOF
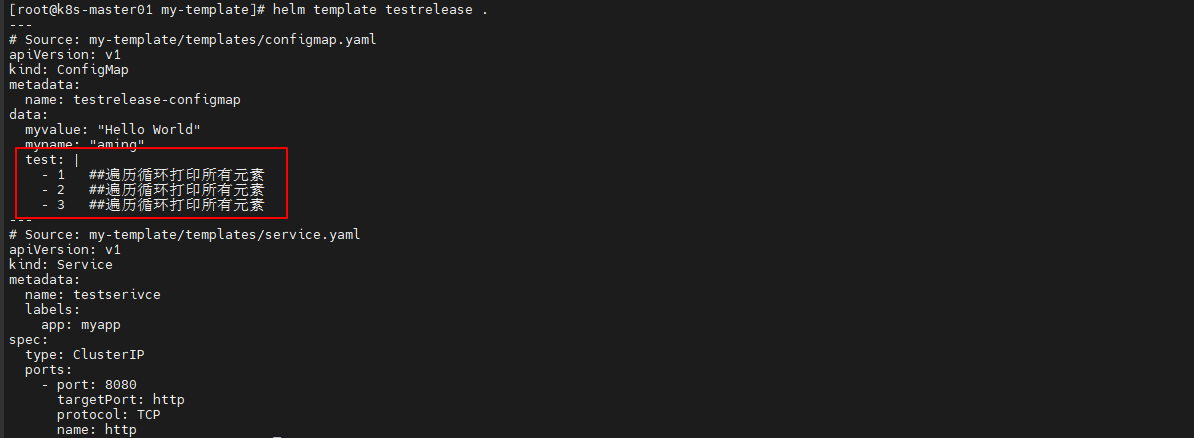
渲染
$ helm template testrelease .