
一、如何在Jenkins中安全管理Secrets
1.1 如何在Jenkins中安全管理Secrets
CI/CD 流水线是 DevOps 团队软件交付过程的基本组成部分。
该流水线利用自动化和持续监控来实现软件的无缝交付。通过持续自动化,确保 CI/CD 流水线每一步的安全性非常重要。
在流水线的各个阶段,通常需要访问凭据等敏感信息。保护这些信息对于保持强大的安全态势至关重要。本文将带你了解如何在 Jenkins CI/CD 流水线中保护机密(Secrets)。
1.2 在CI/CD流水线中使用Secrets
如前所述,CI/CD 流水线通常需要访问敏感信息,如密码和 API 密钥。
以明文对它们进行硬编码会产生严重的安全风险,并且违反了大多数合规框架中的审计准则。使用这些凭证而不在非必要的情况下公开它们的机制,对于自动化软件交付很重要。
用于安全存储、管理和访问上述凭证的工具和技术的集合称为机密管理(Secrets Management)。Secrets 广泛用于 IT、DevOps 和云环境
Secrets 包括:
- 应用程序生成的密码
- 系统到系统的密码
- API 密钥
- 私有加密密钥
- 一次性密码
- 证书
- 特权帐户凭证
CI/CD 流水线集成了多个配置管理平台,需要 secrets 来启用服务到服务的通信。这些平台还需要 secrets 来验证请求访问 SSH 服务器、数据库、HTTP 服务和其他资源的实体。
1.3 CI/CD中Secrets的用途
Secrets 用于管理 CI/CD 流水线中的访问权限。一些用例包括源代码控制管理、基础设施连接、协作提供者和验证。让我们更详细地讨论这些用例中的每一个。
1.3.1 源代码控制管理
版本控制系统,如 Git,便于多人团队之间的协作。
这些系统通过管理和存储来自多个开发人员的代码贡献,来帮助维护应用程序的开发。由于源代码可能包含一些组织最有价值的资产,因此正确验证和管理 Git 存储库的访问权限至关重要。
1.3.2 基础设施连接
CI/CD 流水线通常由在多个主机上的不同服务组成,这些主机分布在不同的基础设施上。
随着这些主机不断地相互通信,通过 API 调用与服务通信,从而实现所需的应用程序功能。
API 密钥和系统到系统(system-to-system)密码等 secrets 能够支持在基础设施之间建立安全的连接,从而连接多租户和多云 CI/CD 流水线。
1.3.3 跨团队协作
CI/CD 流水线包含跨多个开发、运营和质量保证环境的协作活动。这些团队依靠多种工具和框架来协作和共享信息。使用 secrets 进行协作有助于团队确保安全通信并在双方之间提供一层信任和安全保障。
1.3.4 验证
身份验证是 CI/CD 和应用程序安全的关键要素。通过将应用程序连接到身份和访问管理 (IAM)解决方案,secrets 用于确保 CI/CD 流水线的安全性和隐私性。这些解决方案提供了用户角色和权限的外部数据库,让用户无需在 CI/CD 流水线中暴露其凭据即可登录应用程序。
1.4 CI/CD中的Secrets使用示例
要为改进机密管理奠定基础,了解一些简单的用例会很有帮助。
1.4.1 AWS凭证
作为领先的云 SaaS 平台之一,AWS 是大多数基于云的基础设施的常见选择。与 AWS API 交互以预置和查询资源通常需要使用密钥/访问密钥凭证。保护这些凭证对于维护 AWS 账户的安全至关重要。
1.4.2 基础架构即代码 (IaC)
现代应用程序架构通常依赖于基础架构即代码 (IaC) 来部署运行工作负载的底层系统。对这种配置进行编码能够更轻松地对可重复、可扩展和安全的基础架构进行维护。在配置此基础架构的过程中,通常需要将敏感信息(例如 SSH 密钥和 API 凭证)部署到节点。
通过 IaC 和 CI/CD 自动配置基础设施是一种常见模式,管理机密是该工作流程的重要组成部分。
1.4.3 环境变量
环境变量在大多数 CI/CD 流水线中都有一致的用法。在处理 CI/CD 工作流时,需要动态设置值并保留这些数据,以供其他进程和脚本使用。在许多情况下,敏感值需要通过环境变量传递,这也再次强调了有效机密管理的必要性
1.5 保护Jenkins内部的secrets
Jenkins 需要访问大量凭据才能与构成完整 CI/CD 流水线的所有平台和应用程序交互。Jenkins 附带了一个默认的凭证插件,其提供一个内置的机密存储。还带有凭据绑定插件,可以将凭据绑定到环境变量。
将机密存储在 Jenkins 控制器中使流水线中的应用程序,即使这些机密仅被创建一次仍然能够被多次引用。虽然 Jenkins 凭据插件提供了一种存储和管理机密的简单方法,但任何 Jenkins 管理员和流水线作者都可以访问它们。因此,DevOps 团队应确保正确配置访问权限,以确保 CI/CD 流水线的安全。
1.6 Jenkins支持的secret类型
Jenkins 机密插件支持的凭证包括:机密文本、用户名/密码对、机密文件、SSH 用户名和证书。对于数量有限的机密,可以单独存储,而大量机密通常最好使用凭证文件进行管理。
1.7 在Jenkins中管理secret
接下来我们将讨论在 Jenkins 中保护 secret 的一些可用选项。一起来看看将 secrets 安全地注入 Jenkins 流水线的一些最佳实践。
1.7.1 一次性密码 (OTP)
一次性密码通过确保用户名-密码组合不能多次使用来帮助防止用户帐户被盗用。虽然该帐户始终保留用户名,但用户每次登录时都会收到一个 OTP。这可以保证 Jenkins 管理员和用户帐户的安全,防止机密信息泄露。
1.7.2 避免硬编码机密
删除已硬编码到 CI/CD 配置和 Jenkinsfiles 中的机密。这样能够让敏感凭证信息不出现在流水线中,避免恶意行为者访问和利用。
1.7.3 将机密存储在多个Jenkins文件
将机密存储在多个文件中有助于实施凭据最少暴露原则。这样可以让凭据用于尽可能少的应用程序和用户。
1.7.4 使用授权控制来管理机密权限
开发团队应配置安全检查,以确保请求资源访问的应用程序具有有效应用程序的属性。这些应用程序需要根据 RBAC (Role-based Access Control)策略中分配的权限访问各种资源。
1.7.5 遵循最小权限原则
仅将权限授予需要访问流水线内机密的应用程序。团队应始终如一地审核权限,确保在流水线的整个生命周期中最小权限原则得以实施和维护
1.8 结 论
由于安全性是 CI/CD 流水线的首要考虑因素,因此在 Jenkins 中使用机密时遵循最佳实践非常重要。Jenkins 流水线依赖机密进行身份验证、协作和基础设施管理。CI/CD 机密管理对大多数团队来说都是一个挑战,因为在细节上实施访问控制非常困难和复杂。
而通过机密管理工具,Jenkins 用户可以获得更加集中且安全的资源来管理运行 CI/CD 流水线所需的包含敏感信息的凭据,加速 DevOps 工作流程。同时,安全团队也能够全面了解机密的位置和使用方式。借助自动化流程和集中访问策略,机密管理平台还可以帮助安全团队应对安全相关的法律和合规问题。
二、凭证管理
2.1 凭证管理
2.2 凭证是什么
凭证(credential)是Jenkins进行受限操作时的凭据。比如使用SSH登录远程机器时,用户名和密码或SSH key就是凭证。而这些凭证不可能以明文写在Jenkinsfile中。Jenkins凭证管理指的就是对这些凭证进行管理。
为了最大限度地提高安全性,在Jenkins master节点上对凭证进行加密存储(通过Jenkins实 例ID加密),只有通过它们的凭证ID才能在pipeline中使用,并且限制了将证书从一个Jenkins 实例复制到另一个Jenkins实例的能力。
也因为所有的凭证都被存储在Jenkins master上,所以在Jenkins master上最好不要执行任务, 以免被pipeline非法读取出来。那么在哪里执行pipeline呢?应该分配到Jenkins agent上执行。
2.3 创建凭证
在创建凭证前,请确保当前用户有添加凭证的权限。我们使用超级管理员的身份登录。单击 Jenkins首页左侧的Credentials -> System
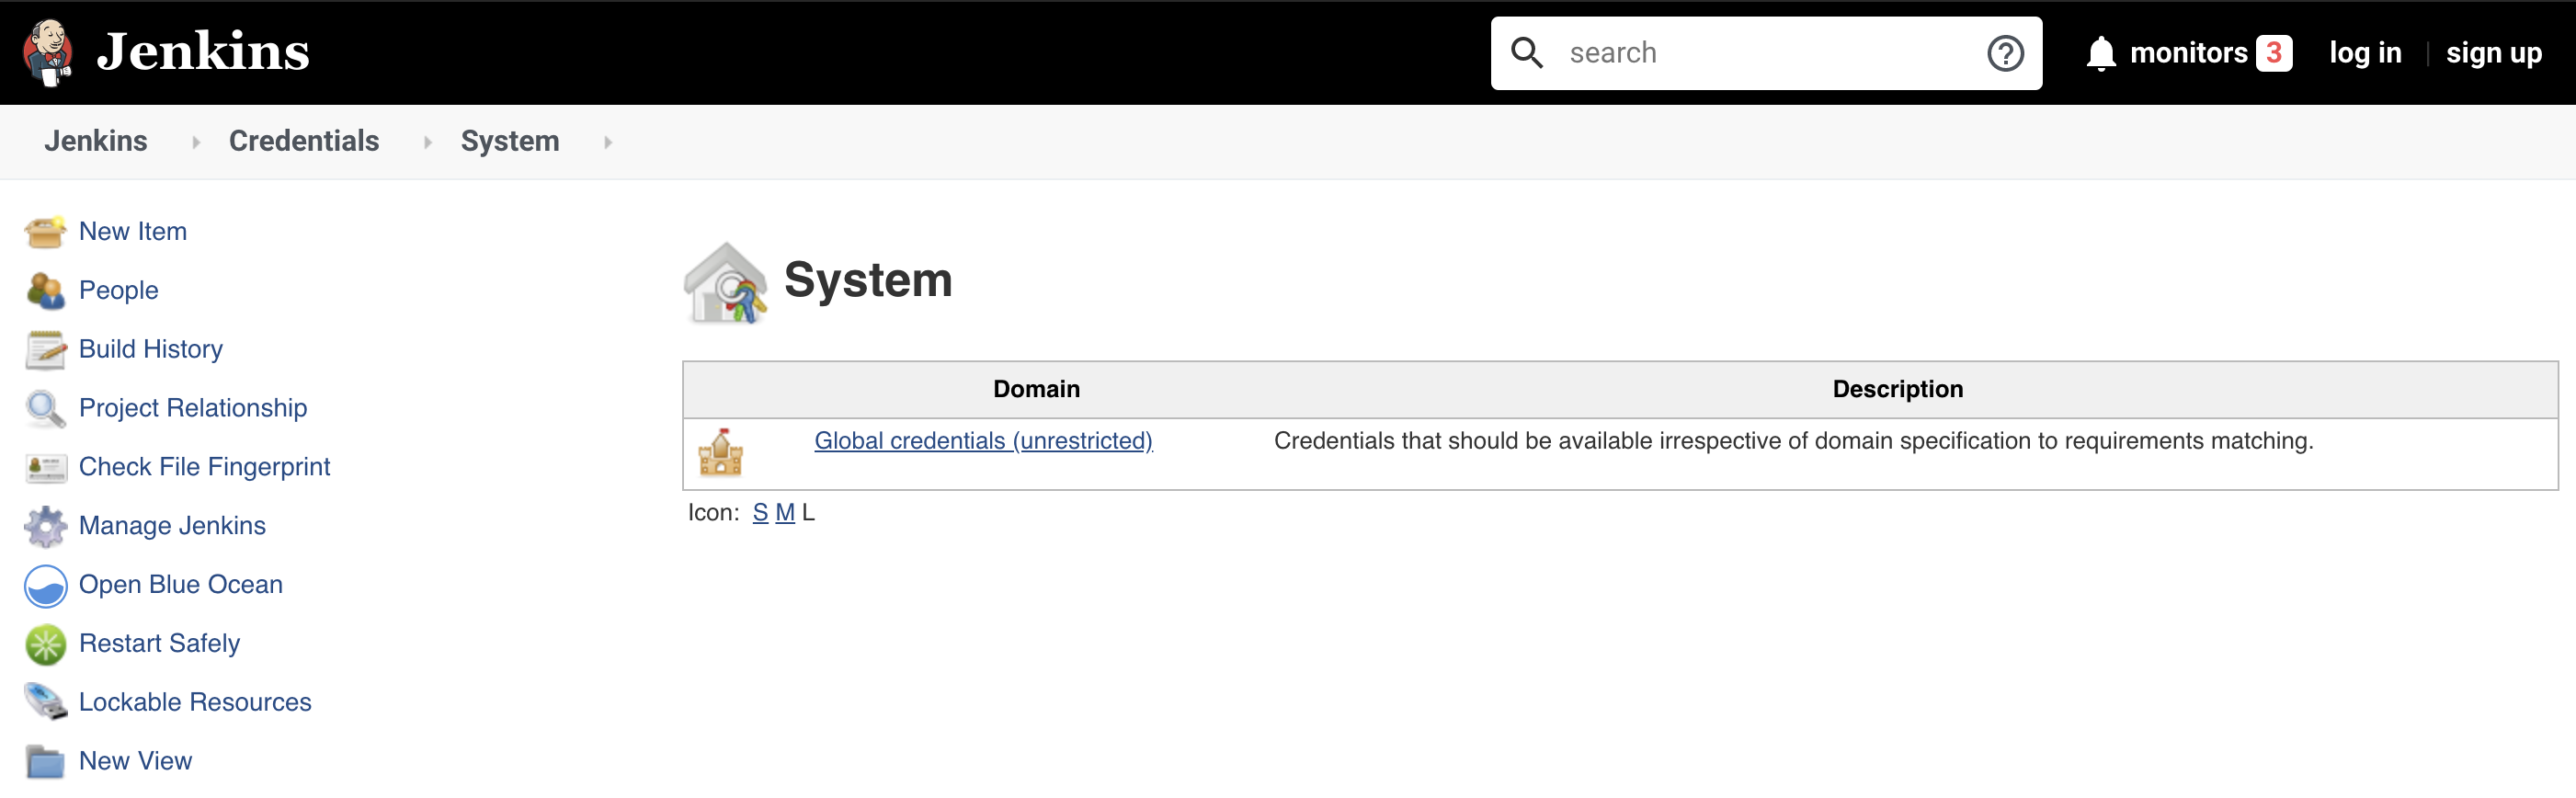
然后单击“Global credentials (unrestricted)”链接,再单击“Add Credentials"
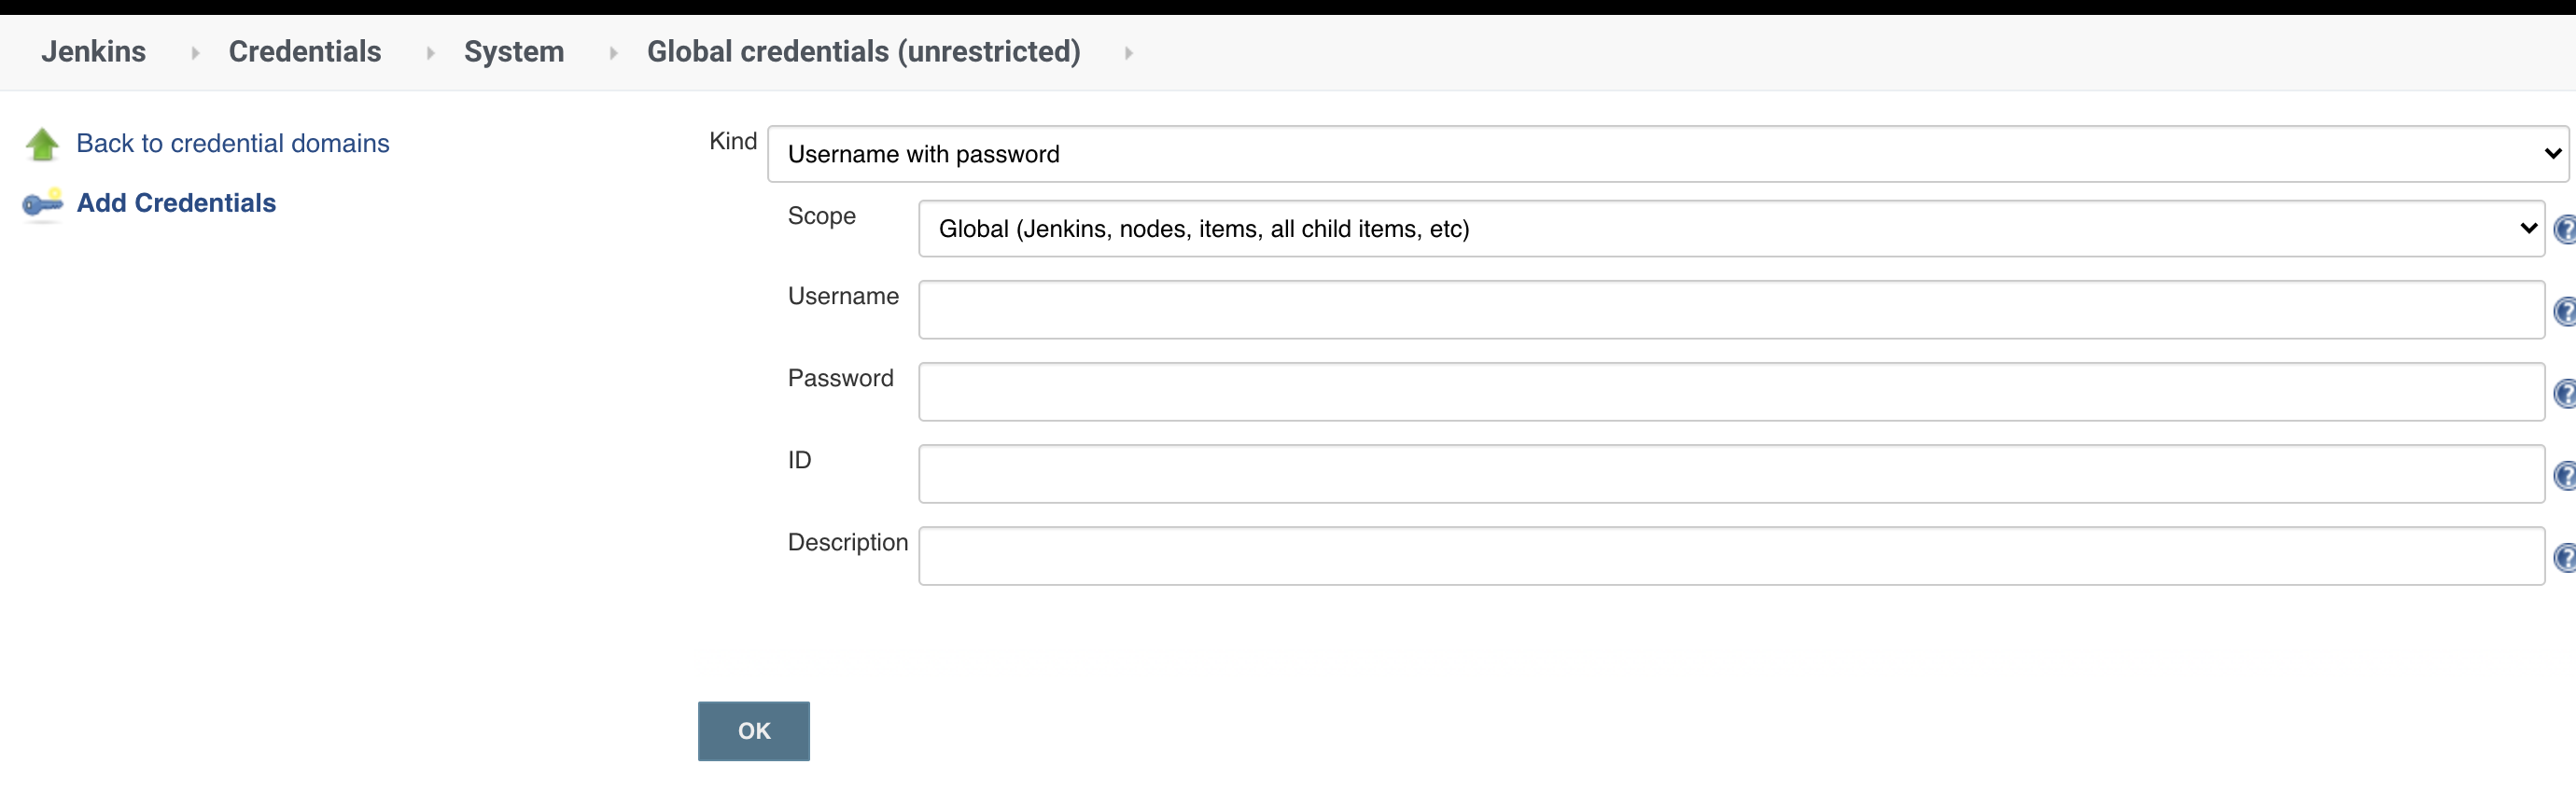
在右侧的表单中、我们来看几个关键的选项。
Kind:选择凭证类型。Scope:凭证的作用域。有两种作用域:Global,全局作用域。如果凭证用于pipeline,则使用作用域,作用域。System,如果用于Jenkins本身的系统管理, 例如电子邮件身份验证,代理连接等,则使用此种作用域。
ID:在pipeline使用凭证的唯一标识。
Jenkins默认支持以下凭证类型: Secret text,Username with password , Secret file、 SSH Usename with private key、Certificate、PKCS#12、Docker Host Certificate Authentication credentials
接下来,分别介绍几种常用的凭证。
2.4 常用凭证
添加凭证后,需要安装"Credentials Binding Plugin"插件,就可以在 pipeline中使用withCredentials 步骤使用凭证了。
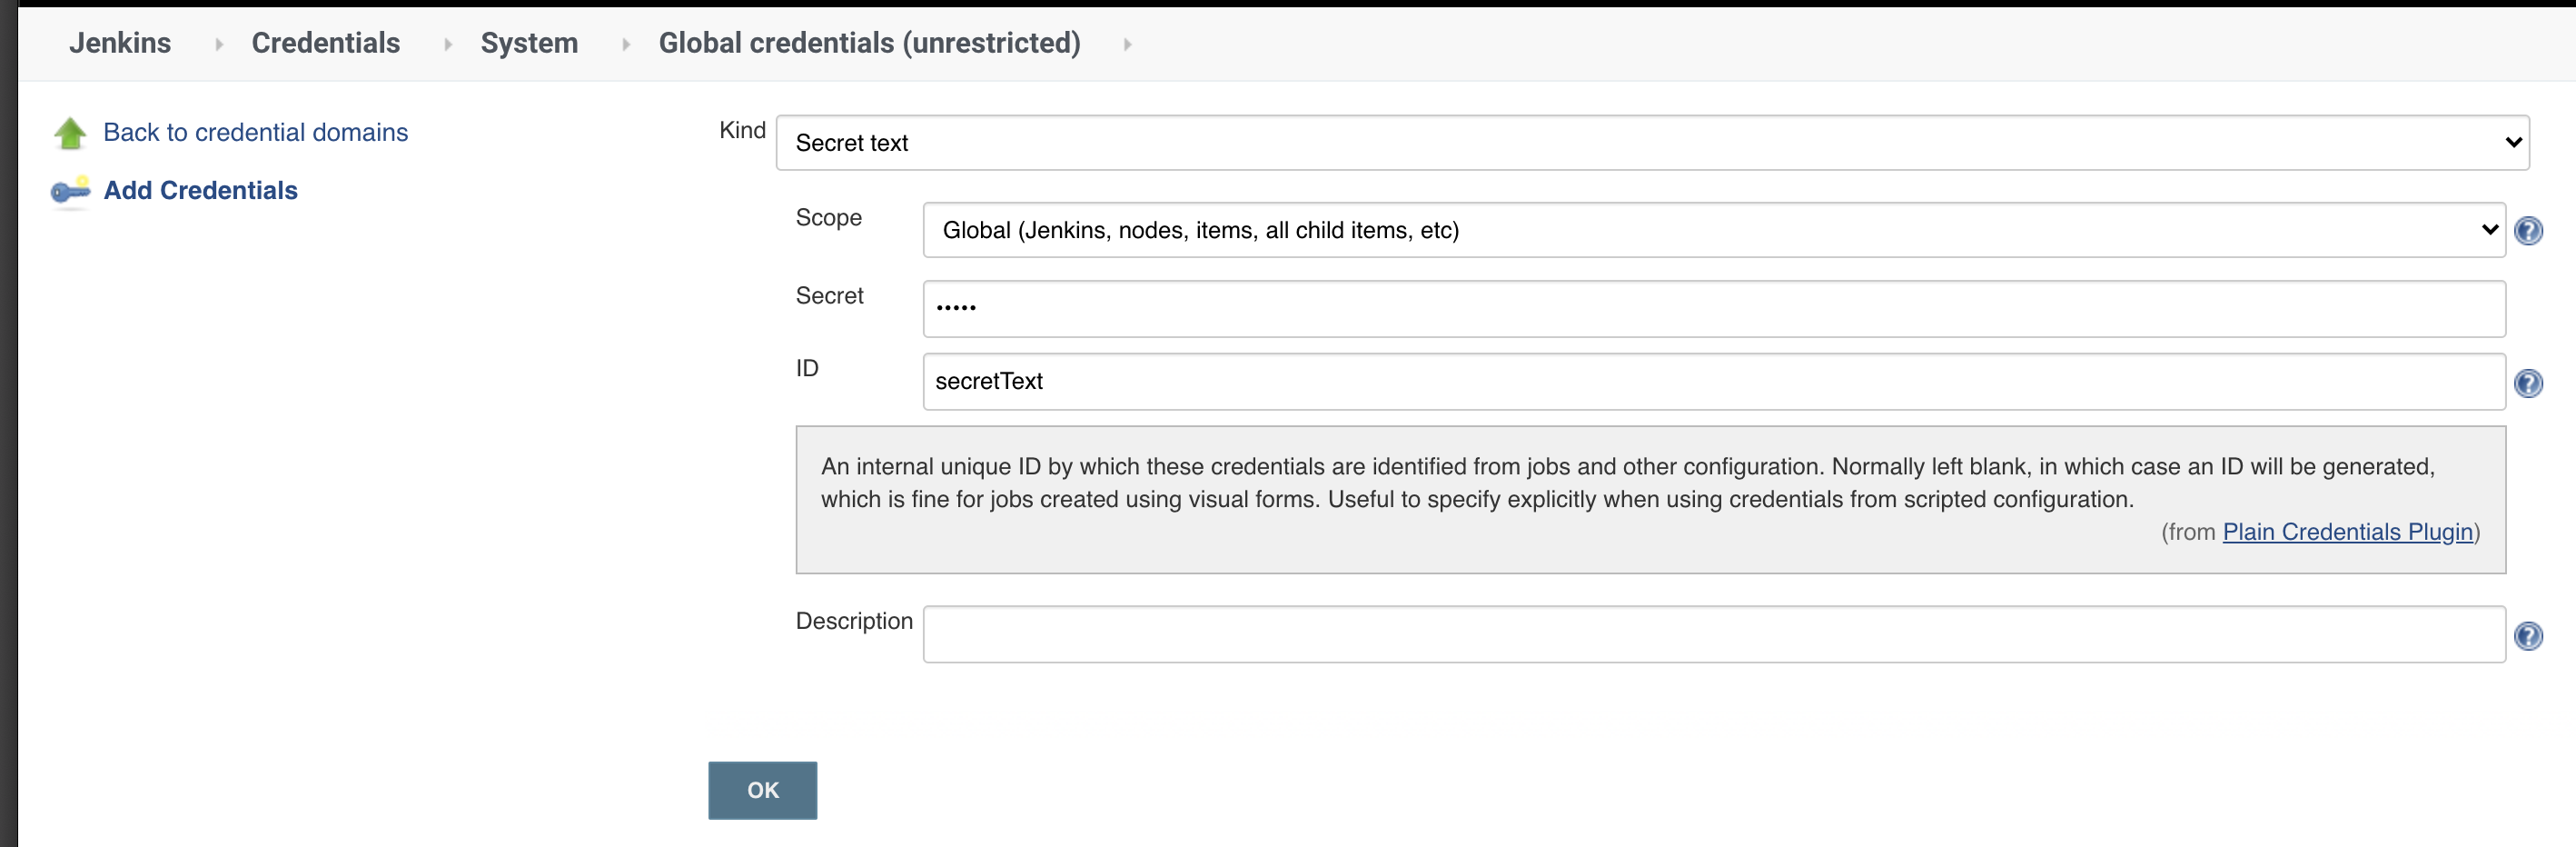
2.4.1 Secret text
Secret text是一串需要保密的文本,比如GitLab的API token。
withCredentials([string(credentialsId: 'secretText', variable: 'varName')]) {
        echo "${varName}"
}
2.4.2 Usernarne with password
Username with password指用户和密码凭证。
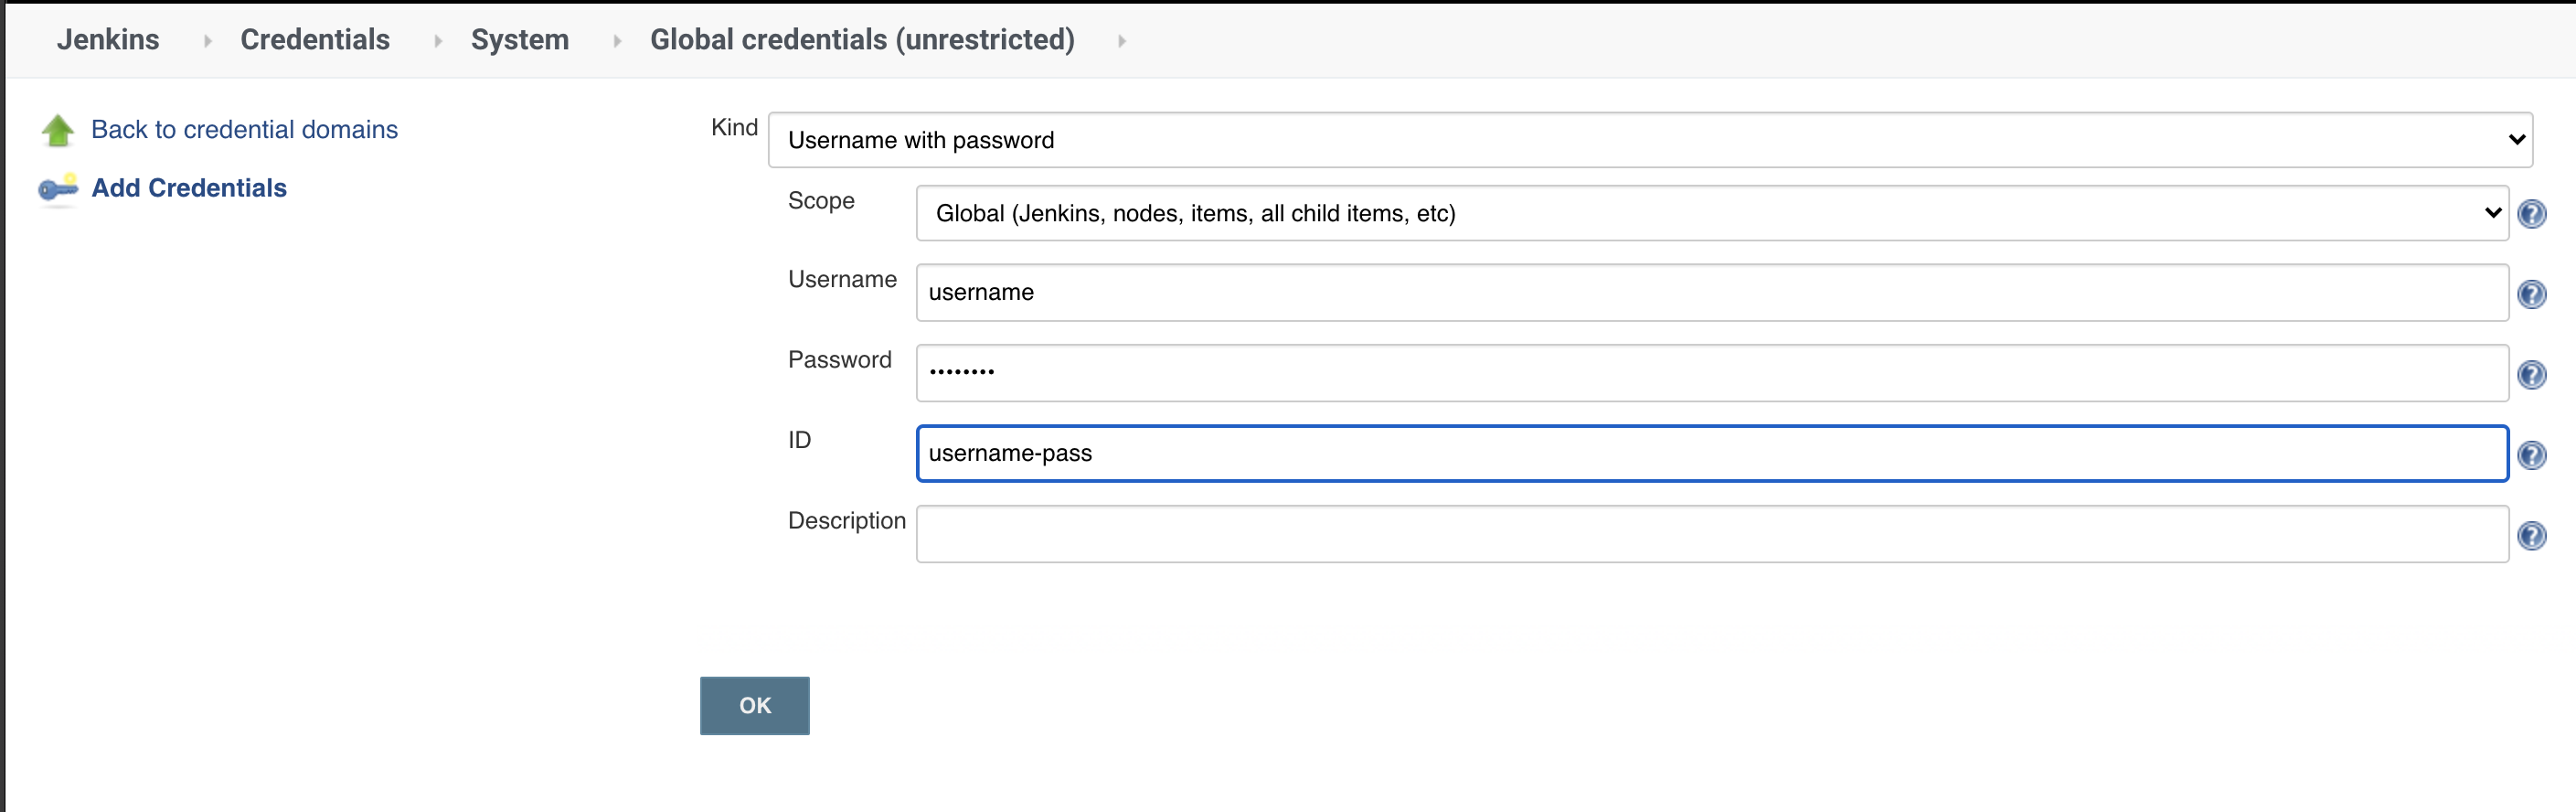
withCredentials([usernamePassword(credentialsId: 'gitlab—userpwd—pair', usernameVariable: 'username', passwordVariable: 'passwd')]){
        echo "${username} ${passwd}"
}
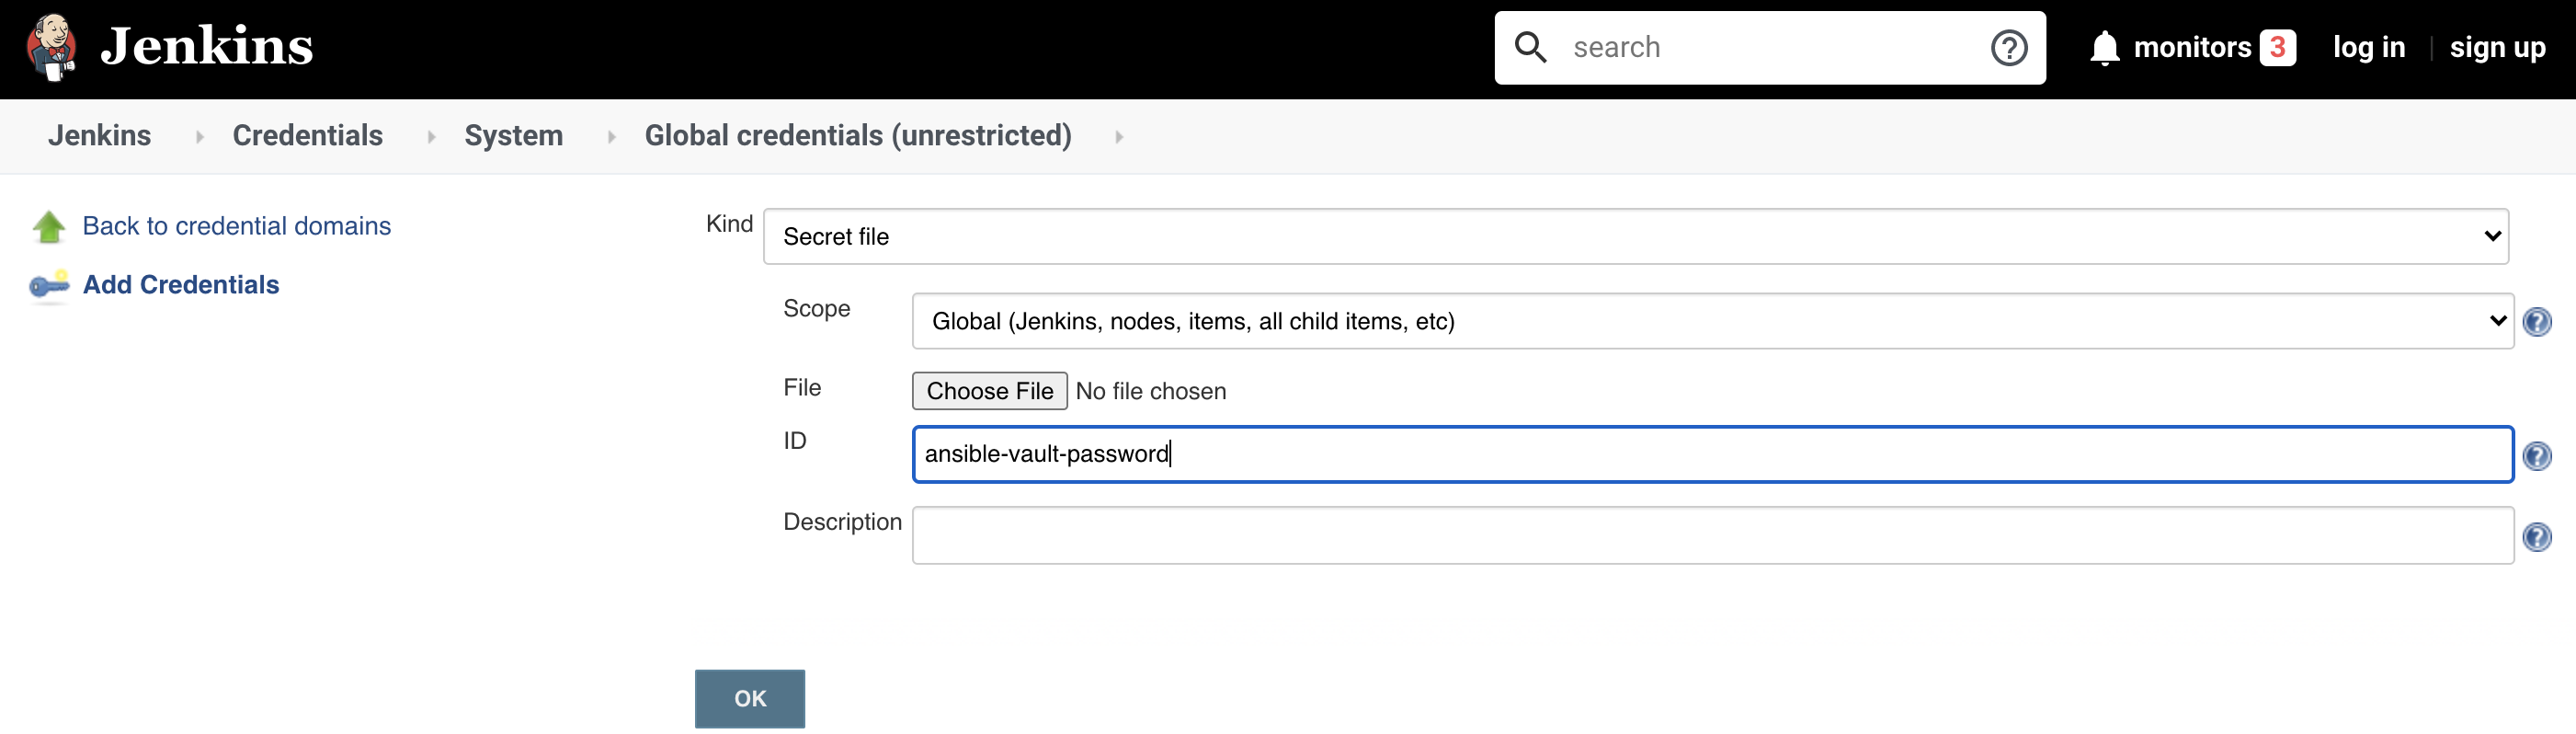
2.4.3 Secret file
Secret file指需要保密的文本文件。 使用Secret file时,Jenkins会将文件复制到一个临时目录中,再将文件路径设置到一个变量中。 构建结束后,所复制的Secret file 会被删除。
示例如下:
withCredentials([file(credentialsId: 'ansible-vault-password', variable: 'vault')]){
        sh "ansible -i hosts playbook.yml --vault-password-file=${vault}"
}
2.4.4 SSH Username with private key
SSH Usernarne with private key指一对SSH用户名和密钥。
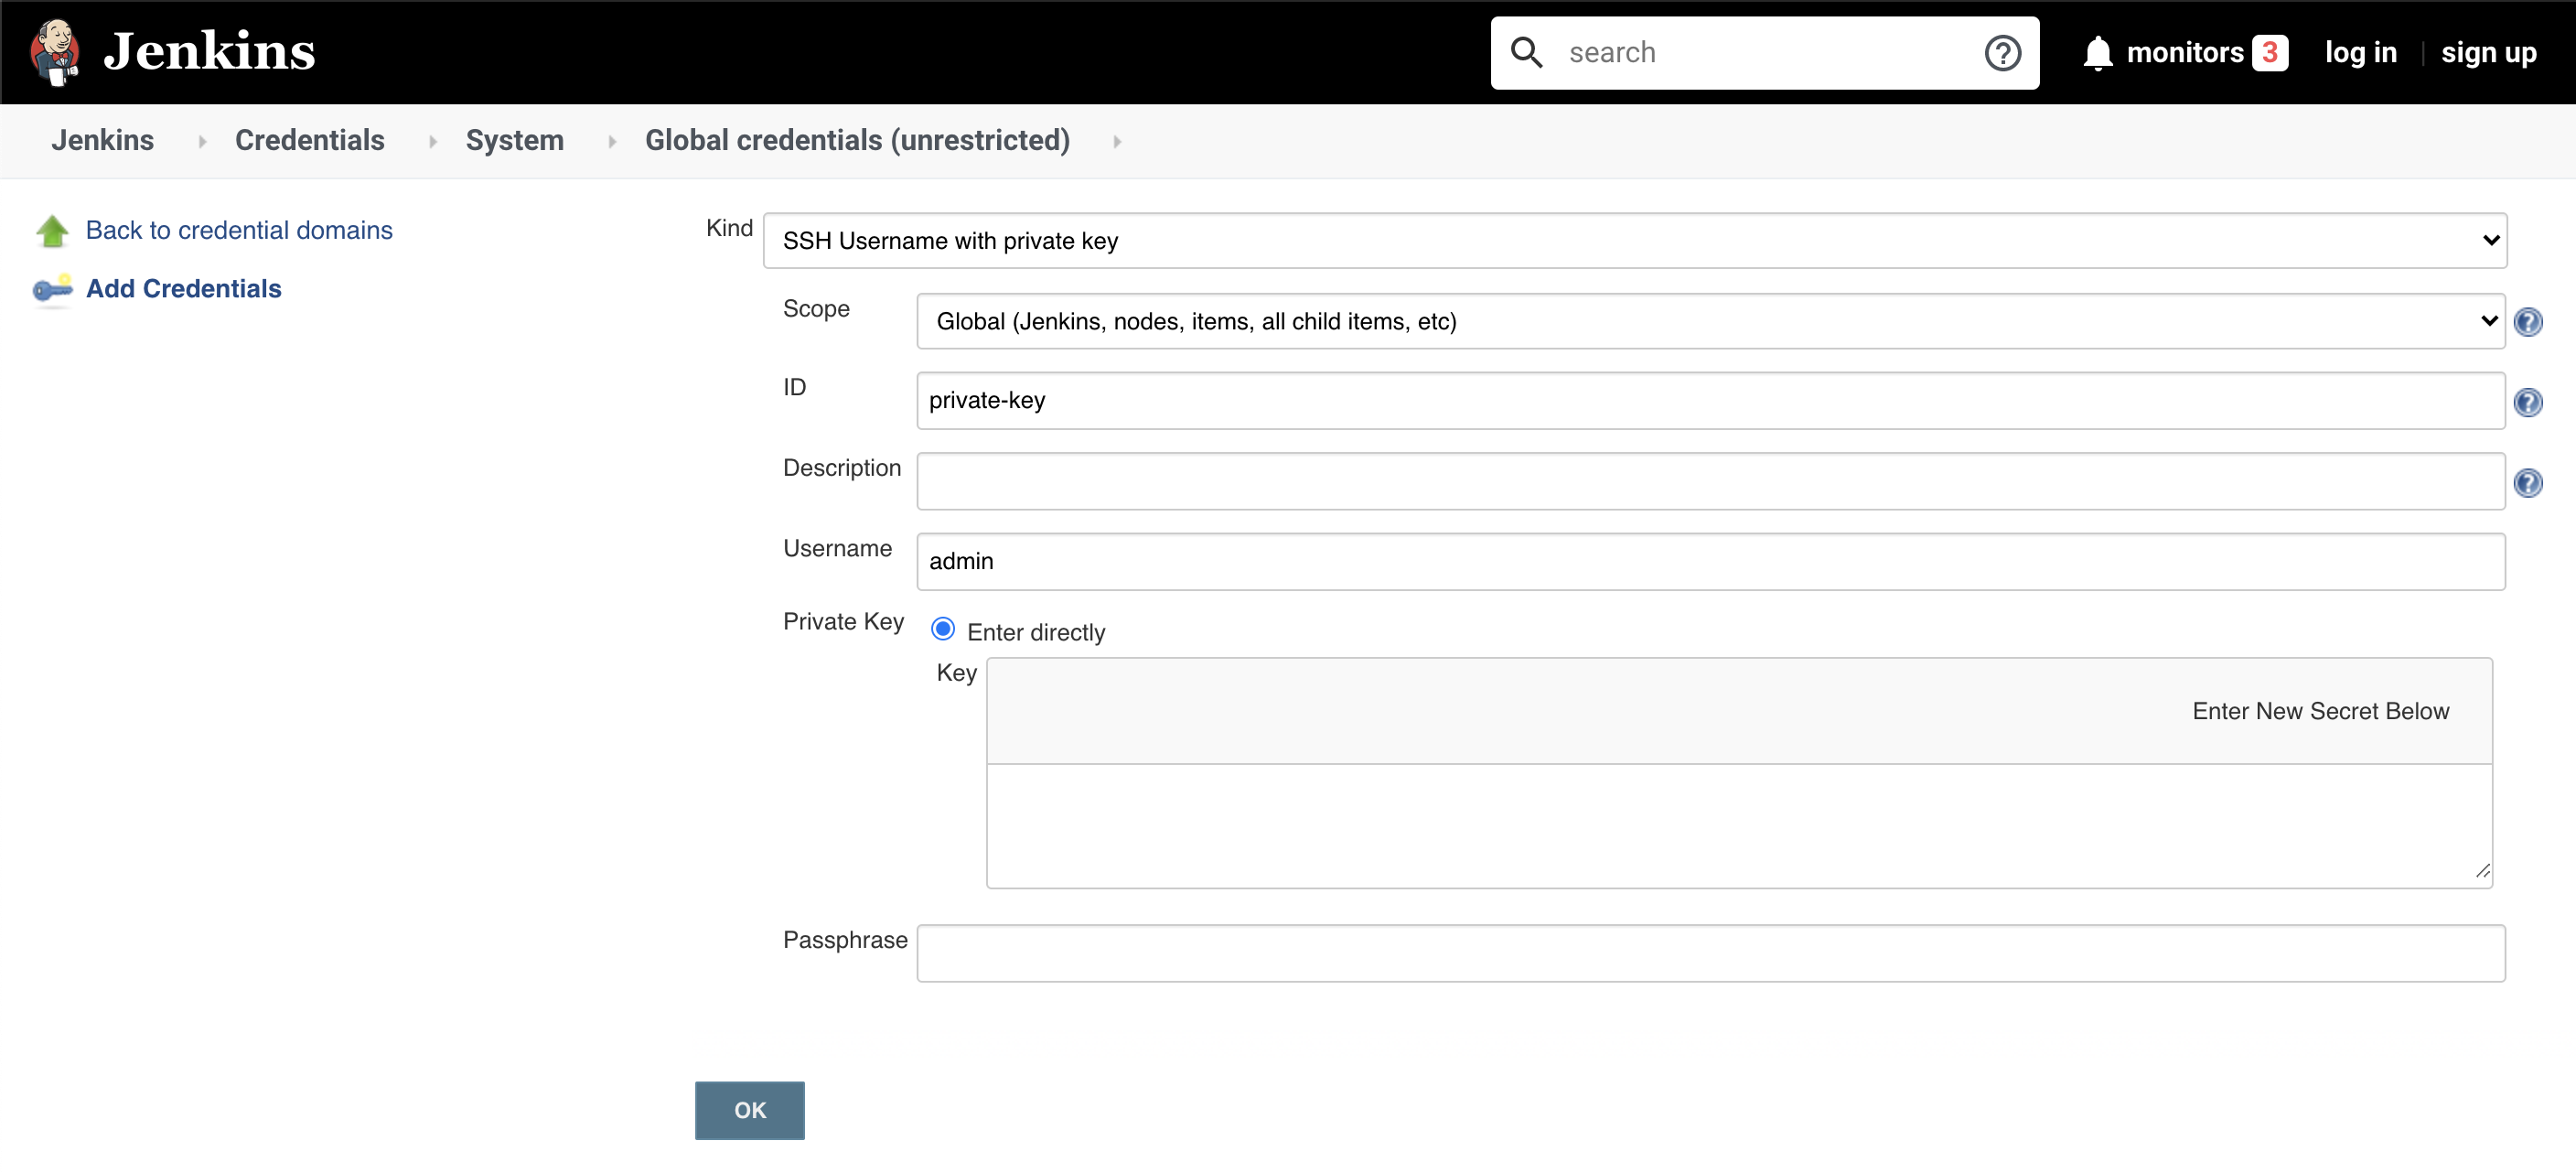
withCredentials([sshUserPrivateKey(
                keyFileVariable:"key",
                credentialsId : "private-key" )]) {
        echo "${key}"
}
sshUserPrivateKey函数还支持以下参数。usernarneVariable: SSH用户名的变量名。passphraseVariable: SSH key密码的变量名。
2.5 优雅地使用凭证
声明式pipeline提供credentials helper方法(只能在environment 指令中使用)来简化凭证的使用。以下是使用方法。
2.5.1 Secret text
environment {
    AWS_ACCESS_KEY_ID = credentials( 'aws-secret-key-id' )
    AWS_SECRET_ACCESS_KEY = credentials( 'aws-secret-access-key' )
}
AWS-SECRET-KEY-ID和AWS-SECRET-ACCESS-KEY是我们预先定义的凭证ID。credentials方法将凭证的值赋给变量后,我们就可以像使用普通环境变量一样使用它们了,如: echo "${AWS_ACCESS_KEY_ID}"。
2.5.2 Username with password
environment {
    BITBUCKET_CREDS = credentials( 'jenkins-bitbucket-creds' )
}
与Secret text不同的是,我们需要通过BITBUCKET_CREDS_USR拿到用户名的值,通过 BITBUCKET_CREDS_PSW拿到密码的值。而变量BITBUCKET_CREDS的值则是一个字符串,格 式为:<用户名>:<密码>。
2.5.3 Secret file
environment {
    KNOWN_HOSTS = credentials('known_hosts')
}
通过credentials helper方法,我们可以像使用环境变量一样使用凭证。
但遗憾的是,credentials helper方法只支持Secret texts, Username with passwords, Secret file三种凭证。
三、凭证管理使用HashiCorp Vault
3.1 凭证管理使用HashiCorp Vault
如果觉得Jenkins 的凭证管理功能太弱无法满足你的需求则可以考虑使用HashCorp Vault
3.2 HashrCorp Vault介绍
HashCorp Vault是款对敏感信息进行存储并进行访问控制的的工具。敏感信息指的是密码 、token、密钥等。它不仅可以存储敏感信息还具有滚动更新、审计等功能
3.2.1 快速启动Vault on Docker
Store Secrets using Hashicorp Vault with Docker
3.2.2 集成HashrCorp Vault
1、安装HashCorp Vault插件
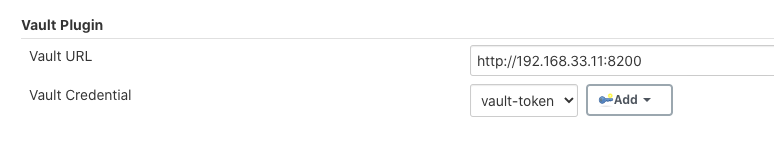
2、添加Vault Token凭证
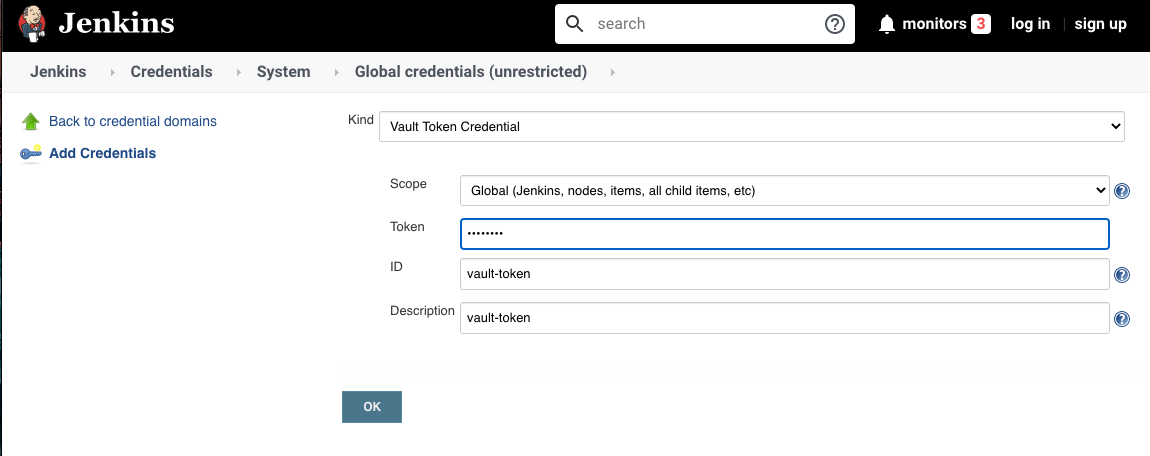
3.配置Vault插件
首先我们使用vault命令向vault服务写入私密数据以方便测试:
vault write -address=${VAULT_ADDR} \
    secret/hello value=world
Success! Data written to: secret/hello
vault read -address=${VAULT_ADDR} \
    secret/hello
Key             Value
lease_duration  2592000
value           world
接着在pipeline中读取,示例代码如下:
pipeline {
    agent { label 'hostmachine '}

    environment {
        SECRET = vault path: 'secret/hello', key: 'value'
    }

    stages {
        stage("read vault key") {
            steps {
                script{
                    def x = vault path: 'secret/hello', key: 'value'
                    echo "${x}"
                    echo "${SECRET}"
                }
            }
        }
    }
}
我们可以在environment和steps中使用vault步骤。推荐在environment中使用。 vault步骤的参数如下:
path,存储键值对的路径。key,存储内容的键。vaultUrl(可选),vault服务地址。credentialsld(可选),vault服务认证的凭证。
如果不填vaultUrl与credentialsld参数,则使用系统级别的配置。
四、(Extra) - Store Secrets using Hashicorp Vault with Docker
4.1 What is Hashicorp Vault
Vault is a tool for securely accessing secrets. A secret is anything that you want to tightly control access to, such as API keys, passwords, certificates, and more. Vault provides a unified interface to any secret, while providing tight access control and recording a detailed audit log. More details can be found at https://github.com/hashicorp/vault/
4.2 Configuration
The first step is to configure a Data Container to store the configuration for Vault.
$ touch vault.hcl

backend "consul" {
  address = "consul:8500"
  advertise_addr = "consul:8300"
  scheme = "http"
}
listener "tcp" {
  address = "0.0.0.0:8200"
  tls_disable = 1
}
disable_mlock = true
The config defines three important properties.
- Firstly, it sets Vault to use Consul to store the secrets. Using Consul enables high availability mode as Consul manages to information and distribution to ensure HA.
- Secondly, it binds Vault to listen on all IP addresses, this is for use with the HTTP API.
- Finally, for development purposes, we disable TLS.
4.2.1 Create Data Container
To store the configuration we'll create a container. This will be used by Vault and Consul to read the required configuration files.
docker create -v /config --name config busybox; docker cp vault.hcl config:/config/;
4.3 Launch
With the configuration data container created we can launch the necessary processes to start Vault.
4.3.1 Launch Services
Launch a single Consul agent. In production, we'd want to have a cluster of 3 or 5 agents as a single node can lead to data loss.
docker run -d --name consul -p 8500:8500 consul:1.8.0 agent -dev -client=0.0.0.0

$ docker ps
CONTAINER ID        IMAGE               COMMAND                  CREATED             STATUS              PORTS                                                                                NAMES
bf950a5631cc        consul:v0.6.4       "docker-entrypoint.s…"   14 seconds ago      Up 13 seconds       8300-8302/tcp, 8400/tcp, 8301-8302/udp, 8600/tcp, 8600/udp, 0.0.0.0:8500->8500/tcp   consul
Our Vault instance can now use Consul to store the data. All data stored within Consul will be encrypted.
docker run -d --name vault-dev \
  --link consul:consul \
  -p 8200:8200 \
  --volumes-from config \
   cgswong/vault:0.5.3 server -config=/config/vault.hcl
--detach , -d: Run container in background and print container ID--link: Add link to another container--publish , -p: Publish a container’s port(s) to the host--volumes-from: Mount volumes from the specified container(s)
4.4 Initialise
With a vault instance running, we can now configure our environment and initialise the Vault.
4.4.1 Configure Environment
This command will create an alias which will proxy commands to vault to the Docker container. As we're in development, we need to define a non-HTTPS address for the vault.
alias vault='docker exec -it vault-dev vault "$@"'
export VAULT_ADDR=http://127.0.0.1:8200
4.4.2 Initialise Vault
With the alias in place, we can make calls to the CLI. The first step is to initialise the vault using the init command.
vault init -address=${VAULT_ADDR} > keys.txt
We store the results in cat keys.txt
cat keys.txt
Key 1: 04028656e5a5726aa2995540a30fe31663150d86ba36924cc2e65a69aa8463ce01
Key 2: 7dcbdb1003a37395e23181eb27bde8a4a68165251f57014ba518466da646c2c202
Key 3: 1bd673dda7ec11327f66dbac5abd0f5608d7ebdc3fd280128906c334607b148503
Key 4: 3d3911be81097c494374e0573b8e23aeab7ffd31b2991b34347ee01b8c7e762604
Key 5: 5b24b97325461eeede23ba10468ec45c052973c8921c9a6d186065424a43a06105
Initial Root Token: b550b1e3-042b-f327-0c44-41f05dcac228

Vault initialized with 5 keys and a key threshold of 3. Please
securely distribute the above keys. When the Vault is re-sealed,
restarted, or stopped, you must provide at least 3 of these keys
to unseal it again.

Vault does not store the master key. Without at least 3 keys,
your Vault will remain permanently sealed.
The file contains valuable information about how to access the vault and seal/unseal. The output includes our master key and token. We'll use this in the next step when communicating with our running instance.
4.5 Unseal Vault
When a Vault server is started, it starts in a sealed state. The server knows how to communicate with the backend storage, but it does not know how to decrypt any of the contents. Unsealing is the process of constructing the master key necessary to read the decryption key to decrypt the data, allowing read access to the Vault.
4.5.1 Unseal Vault
To unseal with Vault server you need access to three of the five keys defined when the Vault was initialised. The following command will grep the first three keys and unseal the Vault.
$ vault unseal -address=${VAULT_ADDR} $(grep 'Key 1:' keys.txt | awk '{print $NF}')
Sealed: true
Key Shares: 5
Key Threshold: 3
Unseal Progress: 1
$ vault unseal -address=${VAULT_ADDR} $(grep 'Key 2:' keys.txt | awk '{print $NF}')
Sealed: true
Key Shares: 5
Key Threshold: 3
Unseal Progress: 2
$ vault unseal -address=${VAULT_ADDR} $(grep 'Key 3:' keys.txt | awk '{print $NF}')

Sealed: false
Key Shares: 5
Key Threshold: 3
Unseal Progress: 0
In production, these keys should be stored separately and securely. Vault uses an algorithm known as Shamir's Secret Sharing to split the master key into shards. Each of the five keys is part of the shard.
4.5.2 Status
You can view the status of the vault using
vault status -address=${VAULT_ADDR}
$ vault status -address=${VAULT_ADDR}
Sealed: false
Key Shares: 5
Key Threshold: 3
Unseal Progress: 0

High-Availability Enabled: true
        Mode: active
        Leader: consul:8300
4.6 Vault Tokens
Tokens are used to communicate with the Vault. When the vault was initialised, a root token was outputted. Store this in a variable with the following command. We'll use it for future API calls. export
VAULT_TOKEN=$(grep 'Initial Root Token:' keys.txt | awk '{print substr($NF, 1, length($NF)-1)}')
You can use this token to login to vault.
vault auth -address=${VAULT_ADDR} ${VAULT_TOKEN}
$ vault auth -address=${VAULT_ADDR} ${VAULT_TOKEN}
Successfully authenticated!
token: b550b1e3-042b-f327-0c44-41f05dcac228
token_duration: 0
token_policies: [root]
The primary reason is to create new tokens using vault token-create.
4.7 Read/Write Data
The Vault CLI can be used to read and write data securely. Vault is a primarily a key/value store. Each pairing can have additional security configuration attached, such as policies on access, TTL, and the ability to be revoked.
4.7.1 Save Data
To store data, we use the write CLI command. In this case, we have a key named secret/api-key with the value 12345678
$ vault write -address=${VAULT_ADDR} \
> secret/api-key value=12345678
Success! Data written to: secret/api-key
4.7.2 Read Data
Reading the key will output the value, along with other information such as the lease duration.
$ vault read -address=${VAULT_ADDR} \
    secret/api-key
Key             Value
lease_duration  2592000
value           12345678
You can also use the -field flag to extract the value from the secret data
$ vault read -address=${VAULT_ADDR} \
> -field=value secret/api-key
12345678
4.8 HTTP API
$ curl -H "X-Vault-Token:$VAULT_TOKEN" -XGET http://127.0.0.1:8200/v1/secret/api-key
{"lease_id":"","renewable":false,"lease_duration":2592000,"data":{"value":"12345678"},"warnings":null,"auth":null}
Using the command like tool jq we can parse the data and extract the value for our key.
curl -s -H  "X-Vault-Token:$VAULT_TOKEN" \
     -XGET http://127.0.0.1:8200/v1/secret/api-key \
    | jq -r .data.value
12345678
This could be used to launch additional processes, such as MySQL, or access external services like AWS. Using this as part of a Docker Entrypoint will be discussed in future scenarios.
五、在Jenkins日志中隐藏敏感信息
5.1 在Jenkins日志中隐藏敏感信息
如果使用的是credentials helper方法或者withCredentials。步骤为变量赋值的,那么这个变量的值是不会被明文打印到Jenkins日志中的。除非使用以下方法:
steps {
    script{
        def hack = 'hack it'
        withCredentials([string(credentialsId: 'abc', variable: 'secretText')]) {
            echo "${secretText}"
            hack = "${secretText}"
        }
        echo "${hack}"
    }
}
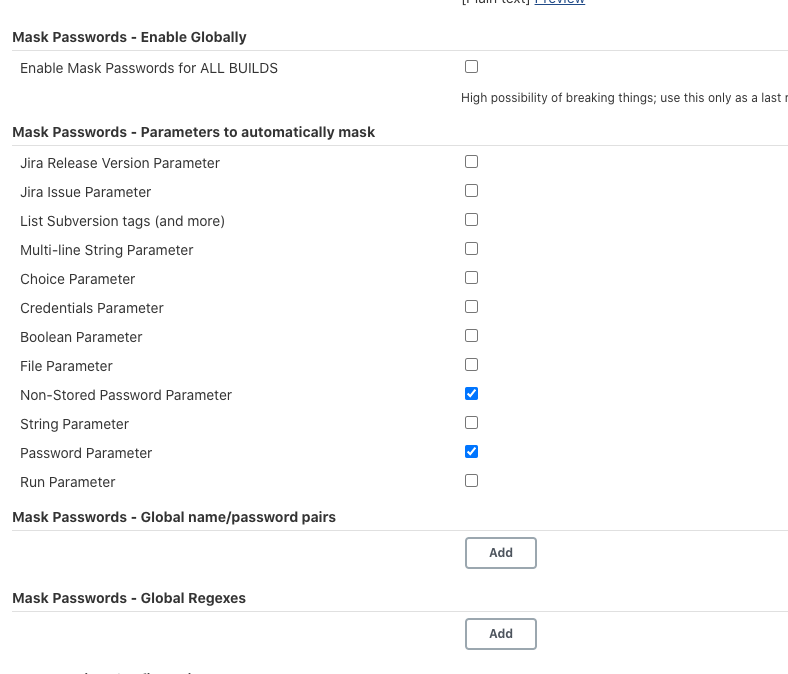
在没有使用credential的场景下,我们又该如何在日志中隐藏变量呢?可以使用Masked Password插件。通过该插件提供的包装器,可以隐藏我们指定的敏感信息。
示例代码如下:
pipeline {
    agent any
    environment {
        SECRET1 = "secret1"
        SECRET2 = "secret2"
        NOT_SECRET = "no secret"
    }
    stages {
        stage("read vault key"){
            steps {
                wrap([$class: 'MaskPasswordsBuildWrapper', varPasswordPairs: [
                    [password: env['SECRET1'], var: 's1'],
                    [password: env['SECRET2'], var: 's2']]]
                    ) {
                    echo "Masked secret: ${SECRET1} and ${SECRET2}"
                    echo "secret1"
                    echo "Not masked secret ${NOT_SECRET}"
                }
            }
        }
    }
}
[Pipeline] stage (hide)
[Pipeline] { (read vault key)
[Pipeline] wrap
[Pipeline] {
[Pipeline] echo
Masked secret: ******** and ********
[Pipeline] echo
********
[Pipeline] echo
Not masked secret no secret
[Pipeline] }
初次使用 Masked Password 插件很容易以为是使用。s1和s2作为变量的,如echo "Masked secret: ${SECRET1} and ${SECRET2}"。
实际上,var参数只是用于方便在自由风格的Jenkins项目 中区分不同的需要隐藏的密文。在pipeline中使用,它就没有存在的意义了。但是即使这样也不能省略它,必须传一个值。password参数传的是真正要隐藏的密文。
那么,为什么echo "secret1"这条语句中并没有使用预定义的变量,secret1也会被隐藏呢?这是由Masked Password插件的实现方式决定的。
Jenkins提供了ConsoleLogFilter接口,可以在日志打印阶段实现我们自己的业务逻辑。 Masked Password插件实现了ConsoleLogFilter接口,然后利用正则表达式将匹配到的文本 replaceAll成******。
MaskPasswordsBuildWrapper包装器除了支持varPasswordPair。参数,还支持varMask Regexes参数.使用自定义的正则表达式匹配需要隐藏的文本。写法如下:
steps {
    wrap([$class: 'MaskPasswordsBuildWrapper',
        varMaskRegexes: [[regex: 'abc--.*']]
    ]
    ) {
        echo "abc--xxxx"
    }
}
通过Masked Password插件还可以设置全局级别的密文隐藏,在Manage Jenkins -> Configure System页中可以找到,